
For our outdoor decor, you may remember I had two camps of inspiration. Lights everywhere and decorating the trees. I was super inspired by a picture, and knew immediately how I would put our own spin on displaying photos.
With wooden photo blocks.
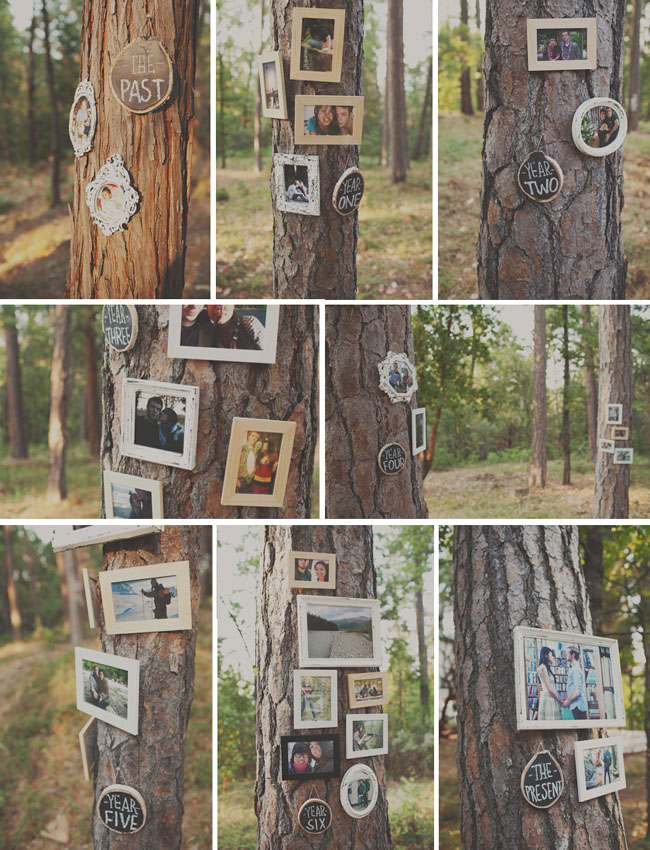 |
| a reminder of the inspiration // via green wedding shoes |
Last Spring I spent a few days putting together our gallery wall in our dining room and I knew I could pull it off again for the wedding. While this is definitely a massive project and a tedious process, it is super easy! Our gallery wall gets a lot of positive feedback, and I love how the photos look on the wood.
 |
| our gallery wall // personal photo |
So, without further ado, my first DIY tutorial!
The pre-steps are just as important as the actual process so pay attention! I say this because I spent an unnecessary $20 on printing photos on actual photo paper that I didn't need to when I made our gallery wall the first time. Whoops. You live and learn.
What you'll need:
mirrored photos
access to a laser printer
access to a laser printer
wood
gel medium
paint brush
cloth
mod podge
Pre-Steps
- Select and flip your photos - pick your photos that you would like to print on wood and choose your sizes. Save new versions and flip them all horizontally. This is a crucial step, especially if you are doing any quote photos. Your photos will be backwards otherwise. I also chose to put a sepia filter on all of my photos to give them the rustic vintage feel.
- Print with a laser printer - This is very important. You cannot print on a inkjet or use regular photos. I now have a laser printer to print all of my wedding photos, but the first time around I took them to Staples on a memory stick. The cost is pretty minimal!
Once you have your photos, you're ready to begin the process!

step one: pick and cut your wood
I had a list of all of my photo sizes and got my dad to cut my wood (with a bit of a border added to the size of the photos). GM Coach (who is actually our neighbour!) has a ton of scrap wood from his business, and has been giving us cut offs for months. This part of the project cost us nothing! Woot! If you don't have access to wood, you can always go to Home Depot or Lowes and get some wood there. I recommend sticking to lighter wood, we have used a range of soft and hard wood.

step two: sand your wood down
I went through each piece and sanded down the edges and gave a decent sand the top of each piece.

step three: plan it out
This is an important step if you're doing more than one photo in multiple sizes. I cut my photos and planned what photos went with each piece of wood.

step four: gel medium
This is where the fun begins. Take your gel medium and paint a light layer over your photo.

step five: smooth it out
Stick your photo on the wood face down and smooth it out with a card (I used an expired license).

step six: wait
You need to wait about 8-9 hours before the next step. The longer the better. In the case of wedding planning, this step has taken over a month of waiting! Whoops!

step seven: rub it off
Soak a cloth in cold water and lay it on your photo for about a minute, then start rubbing off the paper. You can use the cloth or your fingers. The cloth tends to rub off a bit more of the photo (giving it more of a rustic look) and your fingers are a little more gentle. Be careful around the edges!

step eight: wait some more, and do it again
I found that after the water dried, there was still a white film of paper over the photos, I did the seventh step again (sometimes for a total of three times). Make sure you let the photos dry a few hours before moving on to step nine. You want to be sure you got all of the paper off.
 |
step nine: mod podge
Once your photos have dried and you've gotten all of the paper off, it's time to seal the deal! Do a thin layer of mod podge over your photo.
And that's it! Like I said, easy, but tedious! I have been working on this project since November and do small batches at a time to break up the work. We will have a mix of engagement photos, regular photos, childhood photos and quotes to hang on the trees.
What was your biggest DIY project?
No comments:
Post a Comment